Showing posts with label Sew. Show all posts

Tuesday, September 24, 2013

Sew a Recycled Denim Bottle Bag


 My son likes to say, "I grow a little bit each day."  Indeed.  So, this past month, rather than donate five pair of his now too-short jeans to charity (as I usually do), I decided to upcycle them into various projects.

The first project on my list:  Denim Bottle Bags.  These denim bags are easily found on Etsy and Pinterest - and I always admire them.  Because I've sewn bags before, I figured making some bottle bags could not be that difficult.  With the kids back in school, and a basket full of the too-short boys' jeans, I decided the time had come to attempt making some of my own denim bottle bags.

Prepping Material:
  • Denim:  After measuring a wine bottle, I learned that a finished bag should be about 13-inches long and about 7-inches wide.  To account for the seams, I needed to prepare a piece of denim approximately 14.5" x 15".  One jean leg per bag was perfect.   This is a recycle / upcycle project, so of course some jeans had holes in the knees, and others had stains that just refused to come out in the wash (love that Georgia clay!).  I went ahead and used the legs, imperfections and all.  Remember, any denim works - no matter where it comes from. 
  • Liner Fabric:  I wanted a bag with a fold over reveal.  So, the liner fabric needed to be a few inches longer than the outer fabric to account for the reveal.  I cut fabric pieces at about 2 inches longer (14.5" x 17") than the denim.  Most of the bag liners are remnants that I had in my fabric stash.  Fully embracing the recycle portion of the project, I even cut a liner from an old pair of too-short girl's pajama pants - the dachshund pattern was so cute.  
  • Handle Fabric:  Fabric for handles was a bit trickier.  I wanted the handles to match the liners.  Because I was using remnants, I had a bit of trouble getting enough fabric in the right dimensions.  I experimented with various lengths, and finally decided the best measurement was a strip of fabric about 3" x 18".   You can avoid the issues I had by using fresh fabric or using other materials all together, such as rope, twine, etc.        
One afternoon later, I have a nice collection of bottle bags suitable for various types and sizes of bottles and gifts.  Th are perfect for wine bottles, shorter bottles, coffee cups, water bottles.  And, of course, other non-bottle-type contents.
Various sizes suitable for various items.
 If I may say so, they turned out super cute.  Keep reading to see how I made them:

Denim Bottle Bags:
Materials:
  • Old denim jeans
  • Fabric for the liner and strap.
  • Tape measure and quilting ruler, pencil or pen
  • Scissors and/or rotary cutter
  • Ironing board and iron
  • Sewing machine, thread, pins
General How-To:

Step 1:  Prep the Denim for outside of bag:
Cut  off the leg at desired length.
Turn leg inside out and compare the seams.
Remove the inside seam.
Remove bottom hem.
Note:  Jeans may vary in dimensions.  Trim the denim to your specific desired width.  Make sure the denim's outside hem is slightly off-centered - it is a great detail on the front of the finished bag.

Step 2:  Prep the liner fabric:
Remove the selvage and trim fabric to desired size.
Note:  Pay attention to the fabric's pattern orientation when you measure and cut.  The fabric I used in this example has a leaf pattern with a distinct top and bottom.  I cut the fabric so that, when the folded edge shows on the outside of the bag, the stems face up.
Iron out the wrinkles.
Fold top edge of fabric over 1/4" and iron.
Fold edge over again - 1 1/2" or so and iron.
Place denim on top of the liner fabric and line edge up with the bottom crease.
If needed, flip the whole thing over and trim ends so they line up.

Step 3:  Prep the Handle fabric:
Cut a piece of fabric approximately 3" x 18".
Fold one side over 1/4" and iron.
Fold other side over about 3/4" and iron.
Fold each end in about 1/4" and iron.
Fold the whole thing in half and iron down.
All prepped and ready to sew.
Step 4:  Sew it all together:
Sew the handle together.
Sew the liner to denim along the bottom of the reveal.
Fold the bag in half (wrong-side together) and sew a 3/8 " seam along the bottom and side.
Trim away excess fabric to remove bulk.
Turn the bag inside-out.
 Sew 1/4" seam along the bottom and side.
Note:  This seam will enclose the unfinished edge so that it is not visible inside the bag.

Sew the handle to the bag.
All done!
Fill with a bottle and gift-away!

Friday, July 27, 2012

Updating Drapes - It's the Little Things

Before and After
It's the little things in life that can make the biggest difference.  Take, for example, my dining room curtains.  Or drapes, or window coverings.  Or whatever!  
Do you know the difference between a curtain and a drape?  I did not know until this past week.  I've interchanged the terms for years until I read this online article.  Based on the definitions it provides, I have drapes.  Who knew?

Update One: Rope Trim Tieback
When we moved into our house, two single drapery panels hung from a wooden rod and seemed 'sparse' and slightly unfinished.  I added a simple, cream colored rope trim to each drapery panel (previously used in my SAV house) as a tieback soon after we moved in.  I assumed I would change out the drapes someday and did not really put much additional thought into the matter.  After all, we do not really spend much time in the formal dining room.  
Re-purposed rope trim tiebacks are held in place with cup hooks. 
Update Two:  Lengthen with Drapery Clip Rings
The rope trim tiebacks helped.  Still, every time I walked through the dining room, I thought, "Those things are just a bit too short against the white wall."  That thought became a little tic in my brain every single time I saw the drapes.    So, the next improvement I made was to bring the length of the drapes down a couple of inches using drapery clip rings.  The drapes now brush the floor so the white wall paint no longer shows.  What a huge difference that one little (and inexpensive) alteration made!
Adding clip rings lengthened panels - they now barely brush the floor.
Update Three:  Sew Coordinating Fabric Tiebacks (Tutorial follows)
When I updated the wall art in my dining room a couple weeks ago, the draperies once again caught my critical eye. The tones of the drapery fabric did not contrast enough with the wall's paint color, making it look bland.  So, I began scouring the Internet for ideas on how to add some visual contrast.  Houzz and Pinterest are currently my favorite sites for inspiration.  Along with real estate sites, such as Zillow and Realtor.

Ultimately, I decided that I loved the graphic, black-and-white pattern of my wall art fabric so much, I wanted to incorporate the pattern onto the window wall.  Looking at the tablecloth's packaging material sealed the deal for me.   It looked just like a tieback.  Holding it up to the draperies, I knew it would work.
Tablecloth packaging looks just like a drapery tieback! 
I decided to use what was left of my fabric napkins to make drapery tie-backs.  This quick project would not only carry the graphic black-and-white pattern to another wall in the room, but it would also jazz up my otherwise boring drapes. 
Curtain tie-back before and after
Many tutorials exist online for learning how to make drapery tiebacks.  An obvious tutorial I checked was eHow.com.  While browsing Pinterest, I found another great tutorial on the  blogger, Homemade Ginger's, site.

As usual, I read through several tutorials and watched a few videos before coming up with my own method of creating the tiebacks.  This was a re-purposing project that used up scrap material.  Luckily I had enough fabric scrap from my wall art project to create two tiebacks.  I did not need to purchase additional napkins.  If you are considering using scrap material as well, read this link to learn more about industry standards on tieback lengths. 
Now, keep reading to see how I made my simple tiebacks:

Materials:

  • Fabric - in my case I used the remaining 6" x 20" fabric from the napkins used for wall art.
  • Iron and ironing board
  • Pencil
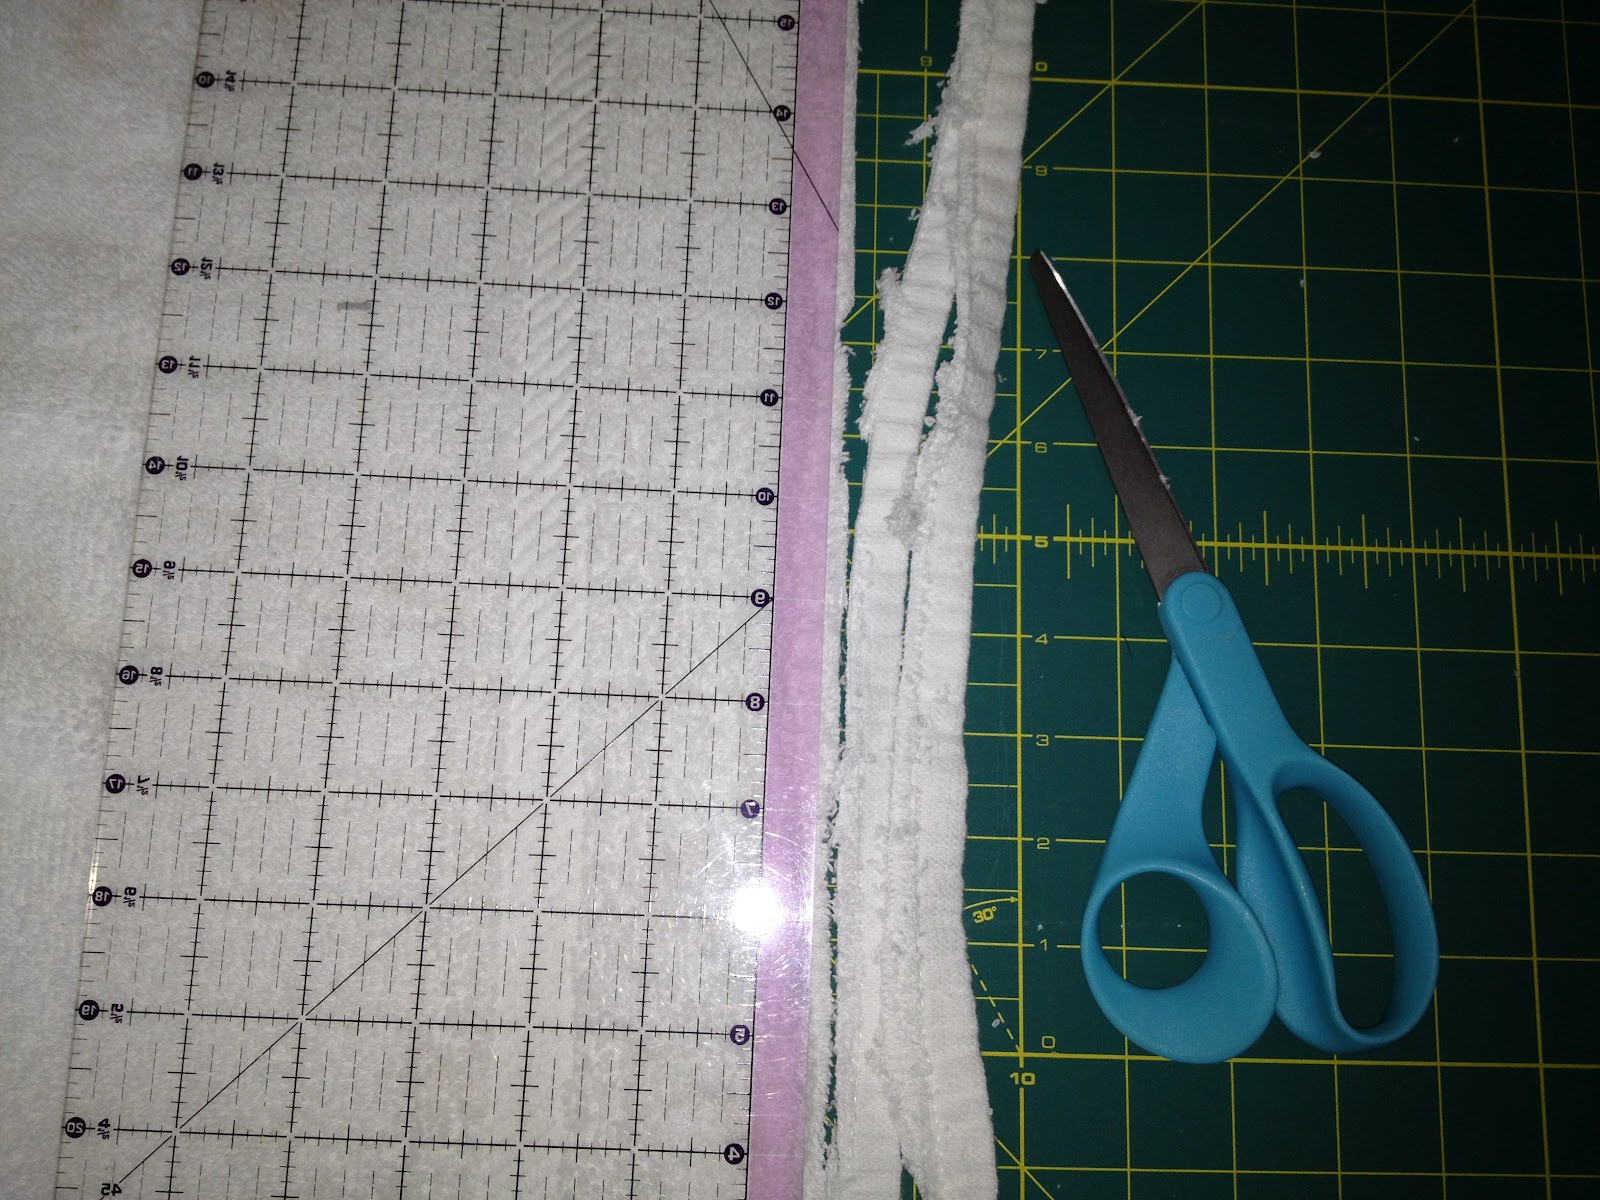
  • Tape Measure or quilting ruler
  • Scissors or Rotary Cutter
  • sewing machine and supplies
General How-To:

  • Measure and cut fabric to length.  Iron to remove any wrinkles.
    Note:  I started with an L-shaped piece of scrap fabric.  I cut it at the corner using a 45-degree angle and then sewed the pieces together on the bias to create a long rectangle approximately 6" x 38."  Yes, I left the original hem - I did not want to waste any width.  

Fabric scraps joined to create proper length.

  • Match the fabric, right-sides together, and pin into place.  
  • Sew fabric in place, along two sides, removing pins as you go.
    Note:  Leave one short side open.

Sew fabric to form a long tube.

  • Turn fabric right-side out, straightening as necessary.
  • Use scrap material to create a loop for the drapery tieback.
    Note:  You can also use an elastic hairband, plastic ring, small length of ribbon, etc.  I cut a small piece off the end of each tieback and sewed it into a loop for a more uniform look.  Truly, this project used every last bit of the original napkins! 

Sew loops for tieback using scrap fabric.

  • Iron each fabric tube flat, folding the open end in about 1/2" and inserting one of the small fabric loops.  Pin into place.

Insert the loop into the open end of tieback.

  • Top stitch around the entire tieback, closing the open end and securing the loop.  Remove pins as you go.
    Note:  Because I only made one loop per tieback, I folded each tieback in half and sewed it together at the short end to create a large loop.  An alternative method would be to sew the open end closed and then sandwich the loop between the two short ends and stitch to secure.  Or, to create two loops per tie back.   My method worked pretty well for a first attempt.

Attach loops to tiebacks

  • Install the tiebacks and your'e done!  Stand back and reflect on how a little (and zero-cost) thing can make such a big difference.
Draperies with newly installed tiebacks
Drapery tiebacks coordinate with the wall art.


I like this tieback look so much more than the previous rope trim.  The project took about one hour and cost zero dollars.  Very simple to do, and priced right.  If and when we opt for update or new draperies, I will not hesitate to make a new set of tiebacks using the skills I just learned.    It's the little things...

Monday, June 18, 2012

How to Sew a Beach and Pool Chaise Organizer

Beach Chaise Organizer - made by re-purposing three hand towels 
I was shopping last weekend, preparing for summer beach trips.  I am not in the market for any more beach gear - I have plenty.  But then I saw an organizer for chaise lounges.  What a great concept.  It's basically a long piece of fabric with pockets to keep your phone, sunscreen, glasses, etc. handy and accessible.  I had to admit that I never have seen one at the community pool or beach.  I decided I needed one.  
Beach chair/chaise Organizer
My husband quickly said, "We don't need to buy that - you can make one yourself for free."  I admitted he was right - it looked pretty basic.  The packaging did not even show any trim around the edges.

I researched online - a couple of retail sites selling the organizer provided dimensions - anywhere from 39" x 15.5" to 42" x 16".  The Dimensions Guide web site states that a basic hand towel is 11" x 18" and a basic beach towel is 30" x 60".
I determined my fabric options were as follows:
  • Three hand towels
  • One beach towel
  • Terry cloth yardage from the fabric store
Looking around the house, I discovered the towels my husband uses when he plays tennis are about 24" x 15".   Since he suggested I make the organizer myself, I figured he would not mind if I re-purposed three of his tennis towels.  And, that is exactly what I did.  Keep reading to see how I re-purposed three hand towels to create a beach chaise organizer.

How to Sew a Beach/Pool Chaise Organizer Using Three Hand Towels  

Materials:
  • Cotton terrycloth hand towels - I used three 24" x 15" towels
  • Scissors or Rotary Cutter
  • Tape Measure and Quilting Ruler
  • Pins, thread, seam ripper
  • 1-inch Double Fold Bias Tape, optional - Click here to see how I made my own
General How-To:
  • Match the edges of two hand towels and trim off the excess hem.
    Note:  This is simply to reduce bulk when sewing.
A quilting ruler can help keep your line straight when cutting.
  • Sew the two towels, right sides together, using a 1/4" seam allowance.
    Note:  This forms the base of the chaise organizer and measures 46" long.
Join first two towels together
  • Cut the third towel in half, creating two equal size pieces of fabric.  These are the pocket panels.
    Note:  I also cut off the ends of the towel, just inside of the decorative trim, to create two 15" x 8" pocket panels.  These pieces will be sewn to the ends of the longer towel piece to become the organizer pockets.
Cut along black lines to create two 8" x 15" pieces
  • Cut two 15" pieces of 1-inch double fold bias tape.
    Note:  This will trim the top edge of each pocket panel.  This is optional - the store-bought organizer did not use trim.  I happen to think it jazzes things up and added it.
Cut 15" piece of bias tape for each piece of fabric.
  • Match edges of bias tape and fabric.  Pin in place.
  • Sew bias tape to the pocket panel fabric.  Remove pins as you go.
Sew bias tape to edge of the pocket panel fabric.
Bias tape sewn onto pocket panel fabric

  •  Place the large fabric piece on a work surface.  Lay the pocket panels on the fabric, matching up the ends.  Determine where to sew seams.  Use pins to mark seam placement.
    Note:  The seams divide the pockets.  I chose to create three pockets on one side and two pockets on the other.

Pin three smaller pockets for  for sunscreen, iPod, glasses, water bottle
Pin two larger pockets to accommodate Kindle and magazines/books
  • Sew seams where you pinned.  Also sew along the bottom and side - up to the bias tape trim.  
Pocket seams sewn in.

  • Place the organizer back on a large work surface, right side facing down.  Match edges of bias tape with edge of fabric and pin in place.
    Note:  Match up the bias tape ends in an inconspicuous location.  When you reach the corner, be sure to use enough bias tape to gently 'pinch' it at a 45-degree angle.
    Note:  Again, 
    adding the bias tape trim is optional - the store-bought organizer did not use trim.  

The floor is always a good work surface.
At the corner, gently pinch the bias tape to create a 45-degree angle.
  • Sew the bias tape together where they meet using a straight seam.
Sew a straight seam where the bias tape meets up.

  • Sew the bias tape to the fabric, along the crease of the bias tape.  Remove pins as you go.


  • Flip the organizer over (right side facing up) and carefully fold the bias tape over to the front side.  Top stitch the bias tape close to the edge.
    Note:  This secures the front of the bias tape and catches the back side.  As you get to each corner, be sure to fold the fabric to create a mitered, 45-degree.

Detail of mitered corner
You're done!  Pack your new chaise organizer in your beach bag and head to the pool.  Or beach.  Or, wherever you want to enjoy some summer sun!

Completed Chaise Organizer
New organizer put to use while on vacation - worked like a charm!
I love this project!  I spent about one hour and zero dollars!  This is, of course, because I repurposed the towels and  already had the bias tape on hand.  It is a super useful, practical item, too.

I plan to purchase some fabric at the store this week and make a few more chaise organizers before our vacation - my daughter has already requested one in her favorite colors.