 |
| Phase One: Replace Laundry Room Sink and countertop |
We are fortunate to have a utility sink and a proper laundry room on the main floor of our house. However, having lived with this sink for the past 18 months, we realized it's pretty ineffective as a
utility sink. For starters, it is only about 6-inches deep, which can cause water to splatter on the counter and floor when used. The faucet itself leaks at the base and the spray hose has no water pressure.
 |
| Shallow utility sink and leaky faucet not living up to expectations. |
Added to the issues with the sink, we naively hung the clothes drying rack on the wall adjacent to the sink when we moved in. This makes it awkward to dry clothes and use the sink at the same time. All in all, I've always felt the laundry room is a study in ineffective space planning. My husband has felt that the sink is a study in ineffective product purchasing. We knew we could do better.
 |
| Drying rack hangs on wall adjacent to sink. |
While cleaning up paint and tiling supplies from our
basement bathroom update, we decided the time had come to finally address the laundry/utility room sink. My husband figured switching out the laundry sink should take about 3-5 hours total on a Saturday afternoon. I presented my husband with
my favorite sink option, one I previously sourced at Ikea. My husband really wanted a standard
utility sink, specifically, one he found at the local home improvement store. Since his option was considerably cheaper, and included the faucet, I compromised. We agreed we would switch the sink out with a deeper, molded plastic tub- similar to the one we had in our Savannah house:
 |
| Utility sink inspiration: The extra deep laundry tub set into a cabinet in our old house. |
We verified that the cabinet could accommodate a deeper utility sink and set off to purchase the sink that my husband sourced at the home improvement store.
 |
| Ready for new utility tub |
We were hopeful that we could just insert the new sink into the existing counter top. As much as I disliked the drab Formica counter top, replacing it would mean we may have to address the following items:
- Window Trim Molding: the existing trim had been cut out around the existing Formica counter top backsplash.
- Tile flooring: As with the basement bathroom vanity, the laundry room sink base cabinet was installed before the tile floor. Any new cabinet would need to match the footprint exactly - no spare tile was left.
- Paint: We cannot find any left over paint for this room. If we had touch-ups, we'd need to hope the color-match really matched, or repaint the whole room.
We brought the molded plastic laundry tub home and started to install it. And that is when the real fun began!
 |
| Doesn't fit into existing space. |
Guess what? The new tub did
not drop right into place. The molded plastic rim was about 1/4 inch too long and too narrow for the opening. Argh.
We removed the counter top, thinking maybe we could modify the existing Formica to fit around the tub.
 |
| Counter removed; tub still a bit too large for space. |
In the process, we tore a tiny bit of painted drywall and had to remove a piece of the window trim. Examining the sink in place we realized this job was going to take a lot longer than 3-5 hours. We accepted the fact that that the laundry tub was
not going to work out and headed back to the store. This time, we were going to select a new counter top, a sink, and a faucet.
Installing a Formica Countertop:
We've installed Formica countertops before, so we knew this is a relatively easy process. If you have not installed one yourself, check out a few tutorials first, such as this
eHow tutorial. I will just go through the highlights here:
- Selecting the Countertop: Our existing base cabinet is 36-inches wide. We wanted a durable surface to fit this base, but did not want to spend a ton of money. So, for the sake of budget and time, Formica was the best bet. We chose a stock, 48-inch laminate countertop: VTI Fine's Valencia Jeweled Coral to be exact. We also bought the coordinating End Splash Kit.
 |
| Dry fitting the counter top before cutting to size - the finish works well in the room. |
- Cutting the Countertop: Measure three times and cut once. And, place masking tape along the cut line to protect the laminate finish from the saw blade. You will be glad you did!
 |
| Measure twice... |
 |
| Tape the front-side, but make your cuts on the back-side... |
 |
| Perfect! |
- Installing the End Splash: The end splash kit comes with a right-facing and left-facing piece of laminate. You will need to iron the end splash on first and then trim the excess laminate off.
Note: Click to watch a video that shows more detail. The video host uses a router to trim his end splash; we use a Dremel . Both work great.
 |
| Materials used to add an end splash. |
 |
| Nail wood so it is flush to the edge. |
 |
| Iron the end splash to activate the adhesive and then trim off excess. |
 |
| Verify the countertop is level and flush before securing. |
Installing a Sink and Faucet:
When we returned the laundry tub, we selected a
Franke USA Above Counter Stainless Steel Laundry Sink as a replacement. This sink, aside from being the stainless steel finish I wanted all along, features a 10-inch deep bowl. Perfect!
- Cut a Hole in the Countertop for the Sink: This was straightforward - the manufacturer included a template for us to use. Mounting the sink, however, was much more complicated.
 |
| Drill starter holes in the corners and use a jigsaw to cut along the cut line. |
 |
| Dry fit the sink before installing the faucet. |
- Install the Faucet: We chose the Glacier Bay Keelia faucet for the satin nickel finish and the price. Install was pretty easy - the existing hoses worked out well and my husband only had a few slight leaks immediately after install to take care of.
Note: If you are installing faucets, make sure you have silicone tape available.
 |
| Making the connections. |
- Mount the Sink: Someone had swiped the patented installation clips for easy install out of the box before we bought it. We spent several hours trying to make both the old sink's clips and some universal clips work before we returned to the store and asked them to provide us with the sink-specific clips.
 |
| Faucet installed, countertop and sink attached. |
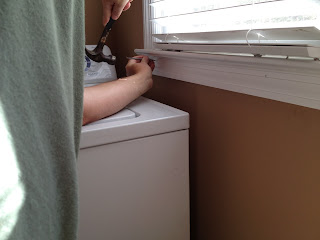
- Replacing Window Trim Molding: Like so many of the steps in this Laundry Room update, the anxiety leading up to the actual task was far worse than the task itself. We purchased trim molding, painted on two coats of white paint and then measured, cut and installed.
 |
| Remove the existing trim... |
 |
| Old trim removed. |
 |
| New molding drying between coats of paint. |
 |
| A small piece needed to be notched out to accommodate countertop backsplash. |
 |
| Nail set hides nails. Finish up with caulk and touch-up paint. |
 |
| Window trim complete. |
Finishing Touches:
- Base Cabinet Paint: While we were unable to locate any spare wall paint, we did locate leftover paint for the base cabinet. It's called Basket Beige:
 |
| Remnant of paint used for laundry room base cabinet |
- We gave the whole thing a second coat of paint - what a difference!
 |
| Painting the doors to the base cabinet |
- Door Hardware: We changed out the brass door knob with a satin nickel door lever. For more information on my philosophy regarding door hardware, see my post about the bathroom refresh.
- Optimize Storage: We did not plan to add tip-out trays for the base cabinet because we thought we were using a laundry tub - it would not have allowed enough clearance. By the time we thought about it again, the sink was already installed. We did, however, add a 30-liter pull-out waste basket. This frees up space under the window where I store my laundry sorter.
 |
| Pull-out Wastebasket frees up floor space. |
- Foam Flooring Tiles as Shelf Liner: I used some spare foam flooring tiles (we bought them at a garage sale a few months ago) to line the floor of the base cabinet. This product cuts very easily with scissors and has a nice finished edge. I love the finished product.
 |
| Repurposed Interlocking Foam Mats as shelf liner. |
Corner Wall Cabinet: I knew I would not re-mount the drying rack adjacent to the sink, or rehang the old sunset photo on the wall next to the window. But, what to do with the wall? After mulling it over, I ordered a
Shelved Corner Wall Cabinet online (gotta love free shipping)! The cabinet is big enough to fill the space without crowding it and adds some interest. I filled a mason jar with clothespins for one shelf, used some white and chrome vessels on another, and topped it with one of my propagated
pothos plants, growing in water and rocks.
 |
| Corner Wall Cabinet fits perfectly. |
I also added a wall-mounted paper towel holder, at the request of my husband. And, with that, we completed phase one of the laundry room update.
Of course, the walls now need to be touched up, and the drying rack needs a new home. Check back in with me and my blog - I will share with you how we addressed both of these issues and ended up with a fully updated laundry room as a result. To think, it all started with a sink.


Unmatched sizes can be a common problem when it comes to replacement, that’s why it’s best to get the right size of the opening before shopping for a new sink. Anyway, you can take it as a blessing in disguise, as the Formica countertop looks great with your sink.
ReplyDeleteAngela Cyrenne