Showing posts with label art. Show all posts

Monday, December 3, 2012

Updating Frames with Paint

A few months ago, I updated some of my framed art by removing the print and replacing it with fabric.  This past weekend, I updated more framed art in my house.  However, this time, I kept the existing prints intact, and used spray paint for a whole new look.
The prints in need of an update were were mementos from a trip to Dunns River Falls, originally purchased on a Jamaican vacation several years ago.  When we decorated our first house, I framed the two prints, to match the family room decor:
Prints framed in white-washed frames and green photo mats.
In our current house, we hung the prints in the basement for a time, though the framing has not stood the test of time.  We've intended to address the artwork when we eventually repaint the room.  Over the months, the artwork bothered me every time I looked at it - the frames are too small in proportion to the wall and the white-wash finish/hunter green mats no longer appeals to me.
Outdated framing not really the right look in current house.
A few weeks ago, after we updated the basement lighting and added fabric wall hangings, I removed the prints and placed them in storage.  I needed to see the wall empty before I hung anything else there.  I did not know how long the wall would be empty, but I knew I'd feel inspired eventually, and did not want to rush it.  These days, when it comes to decor, if I don't really LOVE it, I am not spending a dime on it.

This past Saturday, we bought a custom-framed panoramic photo of Atlanta at a moving sale (for a fabulous price).  The frame was royal blue, which I knew would not work anywhere in our home.  However, I felt the photo would perfectly fill the space above the massive, widescreen television in the basement.  To remedy the unfortunate frame color, I decided to spray paint the frame black.

Paint is the cheapest way to make the biggest impact - and not just on walls.  Frames are perfect candidates to be up-cycled or recycled using paint.  An hour or two and a few bucks are all it takes.  Keep this in mind before you toss or donate old artwork.  And, keep it in mind when you are shopping at sales, thrift stores, or flea markets.

While we were purchasing black spray paint in the home improvement store, I thought of the Jamaica prints.  What if I also use spray paint to update their look?  It would save me money on artwork and re-purpose items we already love.  We stopped in the craft store to buy new photo mats and headed home to update the art.

Prepare the Frame:  The first thing I did, after pulling the prints out of storage, was to remove the artwork and glass from the frames:
Print, mat and glass from frame.
Frames ready for paint.
The newly acquired print been custom-framed.  Because we did not want to mess with the backside, we used paper and tape to cover the glass front and protect it from paint over spray:
Paper and tape protect the glass while spraying.
Paint:  We used two coats of black, universal gloss spray paint.  The paint works well on wood, plastic, metal etc.  So, we knew we could use it on both types of frame with no issues.  My husband applied the spray paint outside - in a well-ventilated area.

Insert Artwork:  After the frames were dry, I inserted the new photo mats and original artwork, making sure to center the print.
Painted frames ready for artwork.
 And the artwork was ready to hang.
Artwork with new mats and newly painted frames!
Frame update complete!
Rehang Artwork:  Up went the new Atlanta print.  Up went the new artwork.  We added shelves and relocated the pool cues while we were at it.
Updated artwork rehung on walls.
I am so glad I did not wait until we painted the entire room to make this change.  For just under twenty dollars (for the paint and new mats), we were able to breathe new life into our beloved prints.  What a difference this interim update makes.

While the spray paint was out, I decided to update and up-cycle even more artwork: with spray paint:

I sprayed an old frame with white spray paint and replaced the poster with a quilt remnant.
I refreshed an estate sale find with black paint.


Wednesday, July 11, 2012

Updating Framed Art

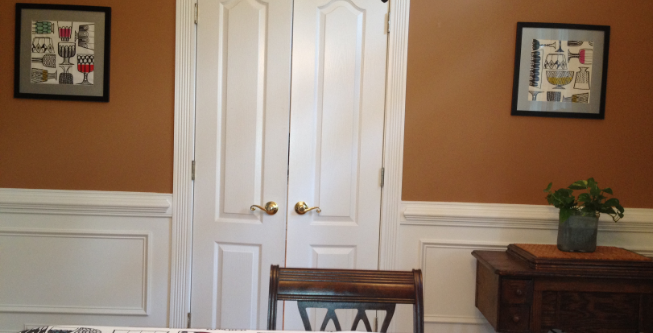
Several years ago, we purchased two, coordinating art pieces from a home decorating store.  The artwork was priced right and went well in the dining/living room - the black frames and silver mats picked up on the other accents in the room, and the scene was reminiscent of my beloved marsh.  After a year or so, I began to feel the muted tones and intentional fuzziness of the picture were depressing.  I took the prints down, stashed them in a closet, and replaced them with metal, sculptural wall art.

As we unpacked and decorated our new house, I rediscovered the prints.  Short on art and heavy on walls, I tried the old prints in the new dining room.  New house, new walls, new vibe, right?  I still liked the frame and mat, but the pictures continued to remind me of trying to see through the windshield during a foggy rainstorm (oddly, this is a recurring nightmare of mine).  The prints also seemed too traditional for what I wanted the room to feel like.  I had to make a change.  Determined not to pay retail for more generic art, I looked for inspiration everywhere - art fairs, thrift shops, estate sales, etc.

This past week, I found my inspiration in this tablecloth:


Inspiration for new wall art
The fun, whimsical, yet sophisticated art on this Merimekko tablecloth made me smile as soon as I spied it.  In the store, the tablecloth fabric was stretched over a canvas and hung on the wall as art.  The motif reminded me of a decorative platter I already have in my dining room, and speaks to the framed, black-and-white sketch art in my living room.  I bought a tablecloth and three napkins and headed home.


Originally, I figured I would cut up the tablecloth and staple it to stretcher frames.  Ultimately, I decided to use the tablecloth as designed (on the table) and frame two of the napkins instead.   Keep reading to learn how to I did it:


How To Update Artwork from Framed Print to Framed Fabric:


Materials:
  • Fabric - in my case, I used a 20" x 20" napkin for each frame
  • Iron and ironing board
  • Pencil
  • Tape Measure or Ruler
  • Scissors
  • Tape
  • Framed Print
General How-To:

  • Iron the fabric.

Napkin before ironing

  • Place the framed art on a large work surface, front-side down and carefully slit the paper backing on three sides using scissors.Note:  I worked on the dining room floor.

Slit paper backing on three sides.

  • Peel the paper backing.
    Note:  You should notice small metal tabs hold artwork in place.

Peel paper back to reveal metal tabs.

  • Bend back the metal tabs, and remove artwork.
    Note:  Leave the glass in the frame and clean it is necessary.

Remove artwork, but leave glass in place.

  • Gently pull mat free from print.
    Note:  In my case, the mat was attached using double-sided tape.  Be very careful to not bend or damage the mat.

Separate mat from artwork.

  • Run the mat over your fabric (napkin) until you determine the desired arrangement.  Mark with a pencil and cut fabric to desired size using scissors or a rotary cutter.
    Note:  I cut a 13" x 13" square of fabric, which left a 1/2 " selvage on all sides.
  • Tape fabric to mat on back side.
    Note:  Pull fabric taut before you apply tape.  Depending on the fabric weight, you may want to use duct tape.

Cut fabric to size and tape to back of mat.

  • Place mat back in frame and top with flipped over artwork.  Press metal tabs down to hold everything in place.
    Note:  Placing artwork back in the frame strengthens everything.  I flipped mine because the white backing of my artwork is white - it will not bleed through the white fabric.  Adjust according to your specific artwork/fabric combination.

Place artwork back in frame, front side facing back.

  • Fold paper backing back over your work and tape.

Tape paper backing to secure

  • You're done!  Hang back on the wall and admire your work.

New Artwork
I love how this simple update brings a smile to my face every time I walk through the room.  I cannot believe I did not update those frames sooner - it was such an easy project.  I had the frames on hand and spent less than twenty dollars on the napkins.  When my tastes change (and they will), I can easily update the frames again.

Want to try this, but don't have a piece of artwork you need to change out?  Garage sales and thrift shops are full of gently used  frames/artwork.  If the artwork is not your taste, but the frame is in good shape, buy it and change out the art!  Or, just pick up a new frame at a craft shop and frame away!

Monday, May 21, 2012

Decorating with Sea Shells


I live in the South, just a few hours from the coast, and have spent many an hour walking beaches to collect shells.  I have come to learn that every beach has its own, unique personality.  The shells, coral, etc. that I see at each one are just as unique. During one of my first trips to St. George Island, FL, just after a red tide came through, we found thousand upon thousand Olive shells and Whelk shells, Calico crabs and Sand Dollars scattered all over the place.  I keep the shells from that trip displayed around my house, and I smile every time I look at them.  Not only because they are beautiful, but because they remind me of how it seemed someone had scattered the most perfect shells on the white beaches just for us.

I've read that one's house should always include elements of nature.  This post discusses a few inexpensive, creative ways I've displayed nature, in the form of sea shells, to enhance my spaces.

First, A Note about Cleaning Shells
Most of the shells I pick up on the beach are empty, fragmented and free of algae, critters, etc.  Sometimes, inhabitants are still living inside - I leave those on the beach.  If staying somewhere with a heat source and large pot,  I usually just boil my shells for a few minutes and lay them out to dry on plates or towels.  This gets rid of the sand too.  This web site offers great tips for cleaning sea shells, including freezing the shells, microwaving shells, and creating a 50-50 solution of beach and water.  Any method works well, and keeps you from travelling home with stinky shells.

Three days of shells drying after being boiled
Display Shell Collections in Vases or on Platters and Dishes
Mason jars, clear vases, and interesting glassware are all great vessels in which to display shells.  I usually keep shells separated by trip.  A platter of assorted shells sits in my entryway and shows off the more unique, favorite shells we've collected.  I added colored and opalescent beads to the platter to add a bit of sparkle.
An antique Mason jar holds shells on my mantel.
A shallow glass bowl contains shells collected from a specific trip

Glass beads add a bit of sparkle to this collection, which sits in the entry hall.

Sand Dollar Art
Who does not love Sand Dollars?   Finding full Sand Dollars is, to me, a real treasure.  When we lived in Savannah, Sand Dollars were all over Wassaw Island, our nearest beach.  However, they were usually alive (it's against the law to take live sea life) and, therefore, not available for the taking.

Sand Dollars are glued to a frame covered in brown micro suede.
I had been keeping the Sand Dollars from my first trip to St. George Island wrapped in tissue paper in a box after a recent move.  While hunting around for something to display on an empty bookshelf, I rediscovered them, and a broken frame (the glass broke months prior).  A little more digging brought me to the remnant fabric.  Read below to learn how I took these items and created my Sand Dollar Art:

Materials:
  • Four Sand Dollars
  • Frame whose glass broke
  • Piece of cardboard cut to fit in the frame.  (Mine is an 8" x 10" frame).
  • Fabric of your choice
  • Hot glue gun

General How To:
  • Clean the Sand Dollars or shells.
  • Cut a piece of fabric a 1/2" larger than your cardboard on each side (the piece I used was approximately 9" x 11").
  • Lay the fabric wrong-side down and place the cardboard on top.  
  • Wrap the fabric around the cardboard and adhere using the hot glue gun.
  •  Flip the cardboard over, arrange the sand dollars and adhere using a hot glue gun.
  • Carefully place the frame around your completed art and enjoy.


Sea Shell Shadow Box Art:
Another beach treasure trove is when I find both halves of a clam, mussel, etc. washed up and still attached at the joint.  A trip to Hilton Head Island, SC beaches yielded several small, full clam shells.  I created a simple piece of art using these shells.   
Sea Shell Shadow Boxes

Read below to learn how I made my Seashell shadow Box art:

Materials:
Find the shadow box at most any craft store
  • Sea shells 
  • Unfinished, wooden shadow box
  • White spray paint or craft paint
  • Bamboo place mat
  • Scissors
  • Hot glue gun
General How To:
  • Remove the back of the shadow box and apply two coats of white spray paint or white craft paint.
    Note:  I used spray paint because it was quicker.
  • Cut a bamboo place mat to fit the back panel of the shadow box.
  • Use hot glue gun to adhere the place mat to the back panel of the shadow box.
  • Position shells on the place mat and use hot glue gun to adhere.
    Note:  One of my clams came unhinged during this process.  I simply dotted glue on the joint and held it until it dried.
  • Carefully replace the back panel and close the shadow box.
  • Hang on wall or place on shelf and enjoy.

Sea Shell Pins:

Many of my smaller shells, like Tellina,  have a tendency to fall to the bottom of jars, or get lost underneath bigger shells.  However, I love these little guys - the colors and detail on these is just great.  I made push pins out of a bunch of mini shells recently and just love them!

I used a hot glue gun to adhere ordinary push pins and stick pins to the back side of the shells.

Use hot glue gun to attach a pin to the backside or inside of a mini shell
Shell push pins on bulletin board
These are really easy, inexpensive ways to use sea shells.  I believe keeping the shells as natural as possible helps me to appreciate the amazing job Nature did.  They are simply beautiful!